This article covers the basic integration and the various operations performed using Telegram by integrating it with MuleSoft. Also we will see how we can implement a basic telegram chatbot using mulesoft.
So the very first question arises here…
How can we link MuleSoft with Telegram?
The answer is simple: using the Telegram connector. MuleSoft’s Telegram connector helps you use the Telegram Bot API. This connector works with the Telegram messenger REST API. Each API call uses a request/response pattern over an HTTPS connection. All required request headers, error handling, and HTTPS connection configurations are built into the connector.
List of Operations
- Get updates – to receive updates from a chatbot channel conversation;
- Send message – to send a message (text, video, link, etc.) to a chatbot channel conversation;
- Update message – to change message content, text for a text message, or URL for a media type;
- Delete message – to delete a message by id from a chatbot channel conversation.
To begin telegram integration we should be familiar with the following:
What are telegram bots?
Bots are third-party applications that run inside Telegram. Users can interact with bots by sending them messages, commands and inline requests. You control your bots using HTTPS requests to Telegram’s Bot Api.
What is Bot Father?
BotFather is the bot that rules them all. It will help you create new bots and change settings for existing ones.
Botfather Commands
- /newbot — command to create a new bot.
- /mybots — returns a list of your bots with handy controls to edit their settings.
- /setname – change your bot’s name.
- /setdescription — change the bot’s description.
- /setuserpic — change the bot’s profile pictures.
- /setcommands — change the list of commands supported by your bot.
- /deletebot — delete your bot and free its username.
- /setprivacy — set which messages your bot will receive when added to a group. With the privacy mode disabled, the bot will receive all messages.
Now we’ll learn how we can create and manage bot in Telegram
Step 1 – Login to your Telegram account
Step 2 – Search for botfather (select the one with the blue tick)
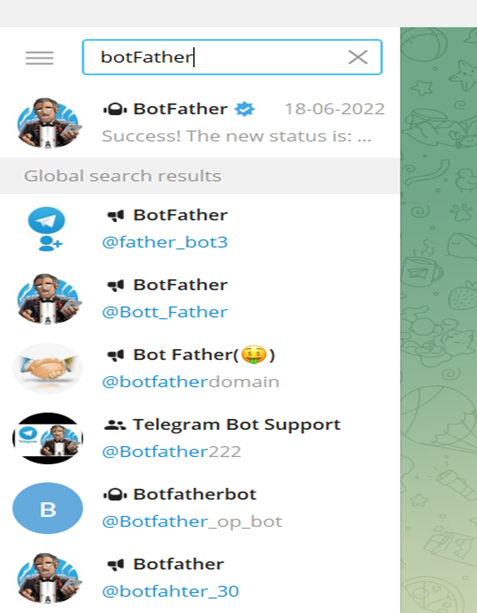
Figure 1: Search the botfather
Step 3 – Give the command /newbot to create a newbot followed by providing a name and a unique username (must end with ‘bot’) for your bot. Once successful, you will receive a unique access token for your bot. Keep your token secure and store it safely, it can be used by anyone to control your bot.
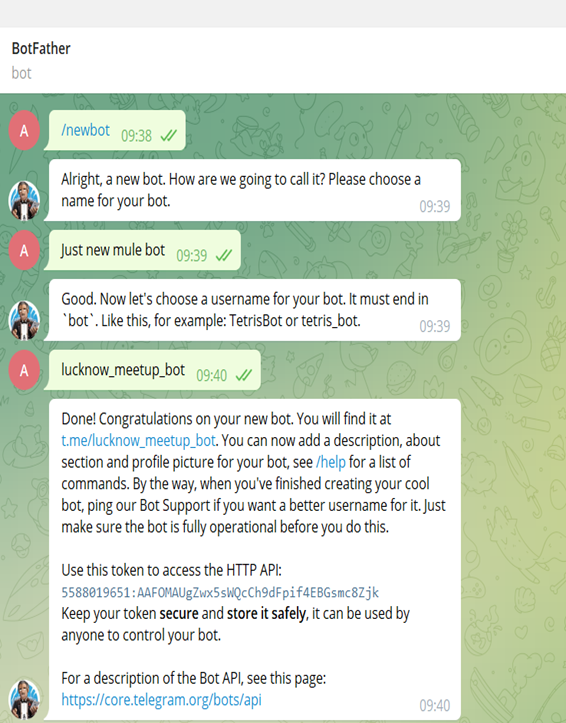
Figure 2: Give Command to botfather
Step 4 – Use command /setprivacy and set it to ‘Disable’ so that if your bot is added to any group chat it can receive/access all messages sent over the chat by any user.
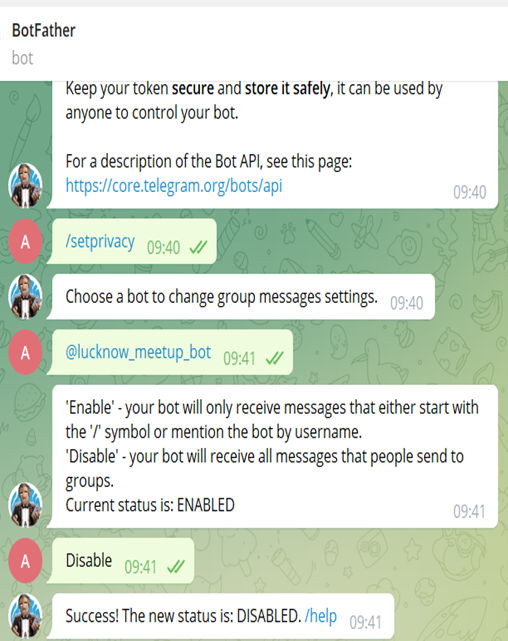
Figure 3: Use command setprivacy
Step 5 – Create a group in Telegram and add your bot to the group and give admin access to the bot.
We’re done with creating and managing bot in telegram, now let’s move on to the implementation part.
Implementation of basic operations
Step 1 – Create a new project in anypoint studio and add the telegram dependency from exchange.
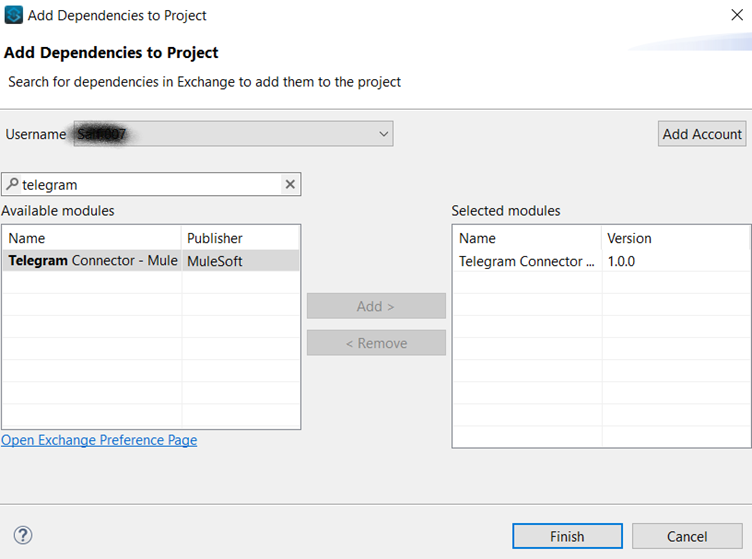
Figure 4: Add Telegram dependency
Step 2 – Create a Telegram connector configuration by providing the bot token which you have received from botfather.
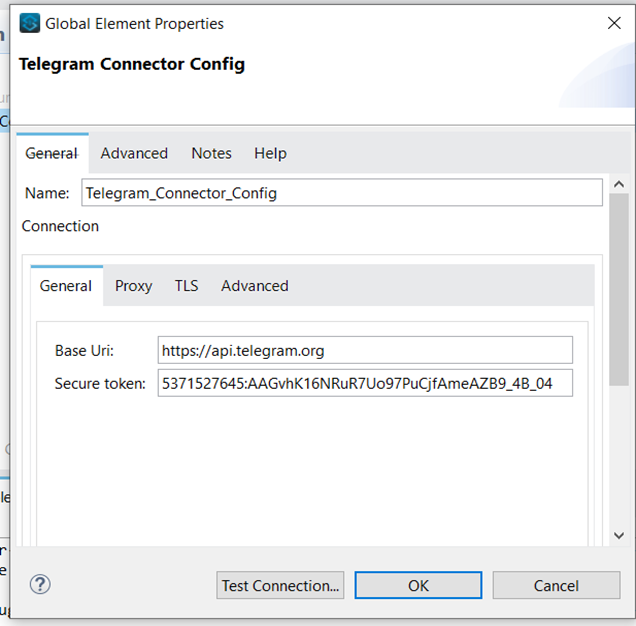
Figure 5: Configure Telegram connector
So, we are done with the Basic Configuration Settings of the Telegram Connector. Now let’s touch upon the different operations that can be performed.
Operation 1 – Get Updates
To receive updates from a chatbot channel conversation. Use this method to receive incoming updates. An array of update objects is returned.
Create a flow, take http listener as source then drag and drop to get updates on operations from the mule palette. Take the optional params offset, limit etc value as queryparams and pass the same.
Limit – Limits the number of updates to be retrieved. Values between 1-100 are accepted. Defaults to 100.
Offset – Identifier of the first update to be returned. (pass the update_id value)
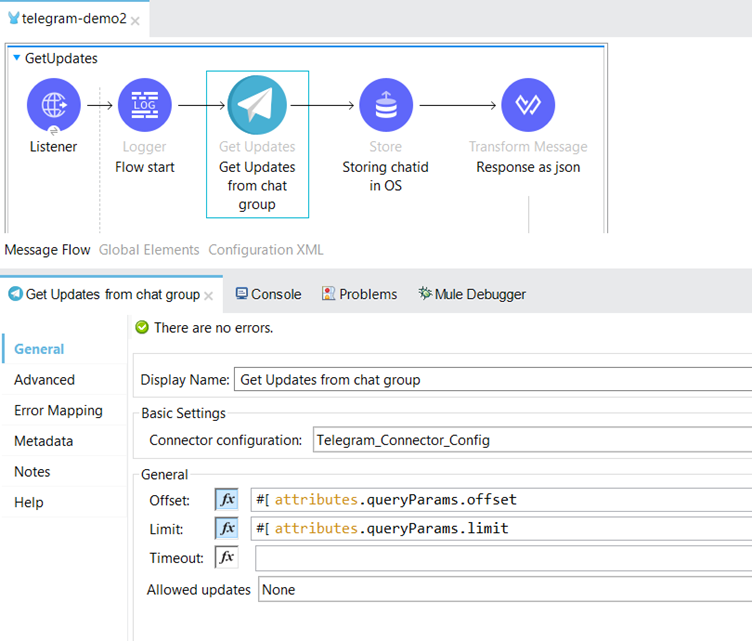
Figure 6: GetUpdates Flow
Here we are storing the chatid (Unique identifier for the target chat) in an OS.
So that we can retrieve and use the same to send/edit/delete any media or text message to the same target chat.

Figure 7: Storing chatid in OS
Now send the request using postman collection as below to get updates from Telegram chat where bot was added as admin.
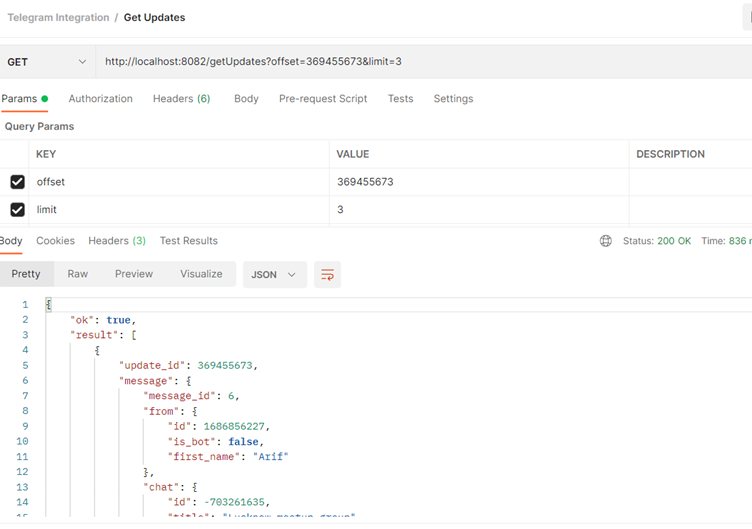
Figure 8 GetUpdates response
Operation 2 – Send Text message
To send a message to a chatbot channel conversation. On success, the sent message is returned.
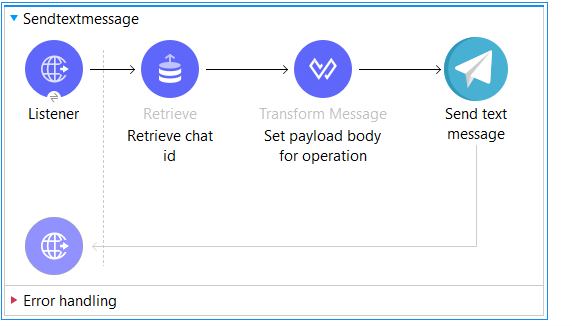
Figure 9: Send text message flow
First we need to retrieve the chatid from the object store and then store it in a target variable (here it is chatid).


Figure 11: Store chatid in target variable
Next, we need to set the body for the send text message operation.
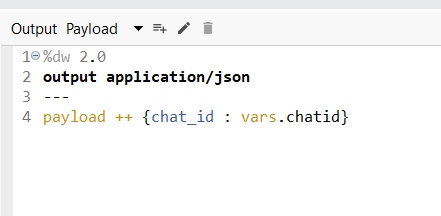
Figure 12: request payload transform
Now send the request using postman collection as below to send a text message.
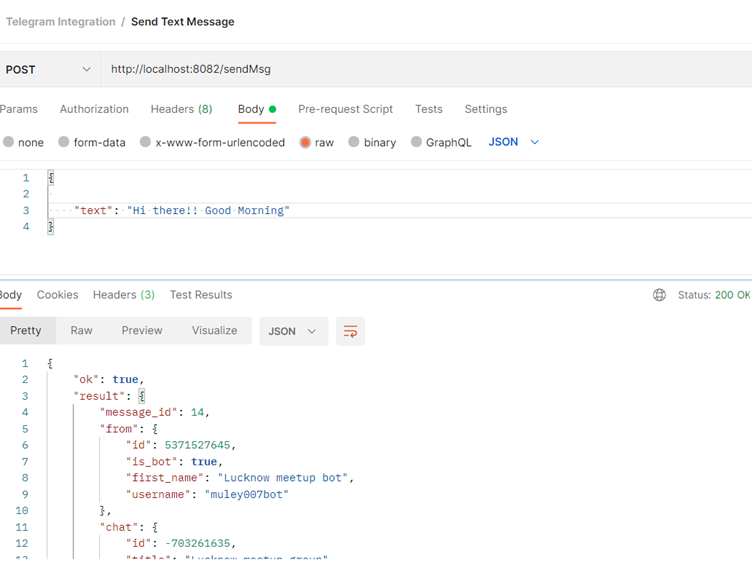
Figure 13 Send Message response
Operation 3 – Edit Text message
To edit a message we need to have the mess age _id of the message that we sent over the group chat . We can get the message id using the getUpdates operation.
Again we’ll be using the retrieve operation of OS to get chatid and then we will set the json body payload in a similar way.
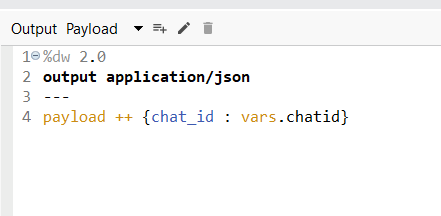
Figure 14: request payload transform
Next, we’ll use the edit text message operation from mule palette.
Now, send the request using postman collection as below to edit the text message.
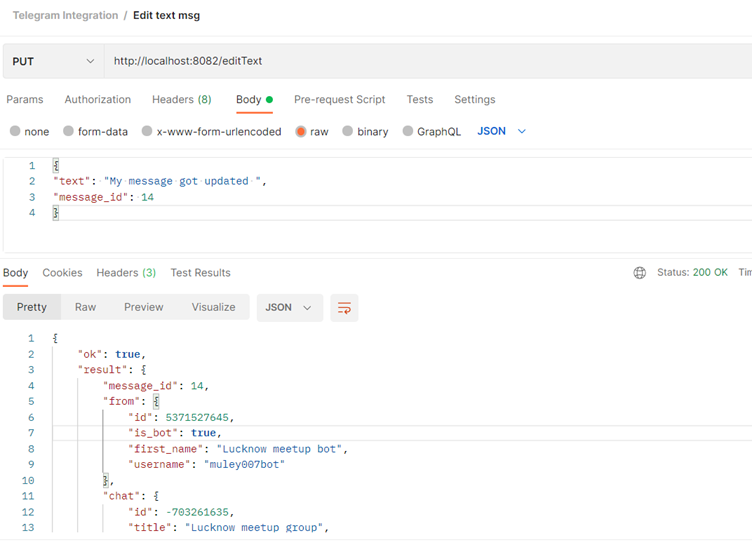
Figure 15: Edit text response
Operation 4 – Delete message
To delete a message, be it text or any media type (photo,video doc ,gif etc), we need to have the message_id of the message to be deleted.
Again, we’ll be using thr retrieve operation of OS to get the chatid and then set the json body payload in a similar way.
Next, we’ll use the delete message operation from mule palette.
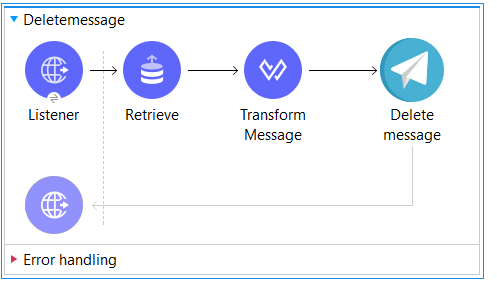
Figure 16: Delete message flow
Now, send the request using postman collection as below to delete a message.
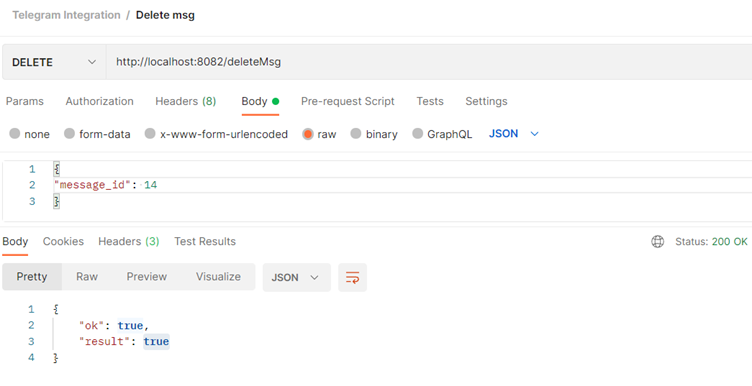
Figure 17: Delete message response
Operation 5 – Send media messages (photo, video, audio, animation, document)
To send a photo to a chatbot channel conversation. On success, the sent message is returned. Again we’ll be using the retrieve operation of OS to get the chatid.
There are three ways to send files (photo, video, audio, animation, document)
- If the file is already stored somewhere on the Telegram servers, you don’t need to reupload it: each file object has a file_id field, simply pass this file_id as a parameter instead of uploading. There are no limits for files sent this way.(Tip – We can get the file_id of any media using the getUpdates operation)
- Provide Telegram with an HTTP URL for the file to be sent. Telegram will download and send the file. 5 MB max size for photos and 20 MB max for other types of content.
- Post the file using multipart/form-data in the usual way that files are uploaded via the browser. 10 MB max size for photos, 50 MB for other files.
For demonstration purposes we’ll be using the HTTP downloadable url of the media. Now let’s see how we can send the json body payload for different media types. To send a media photofield is required.
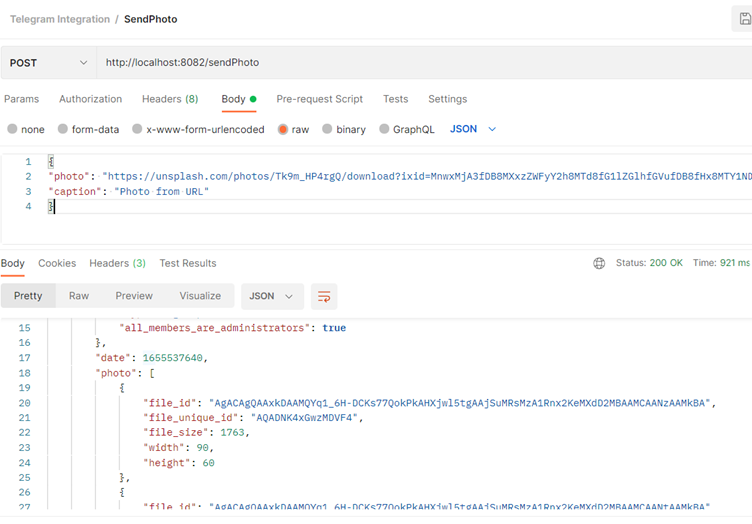
Figure 18: Send photo request and response
To send a media (audio) audio field is required.
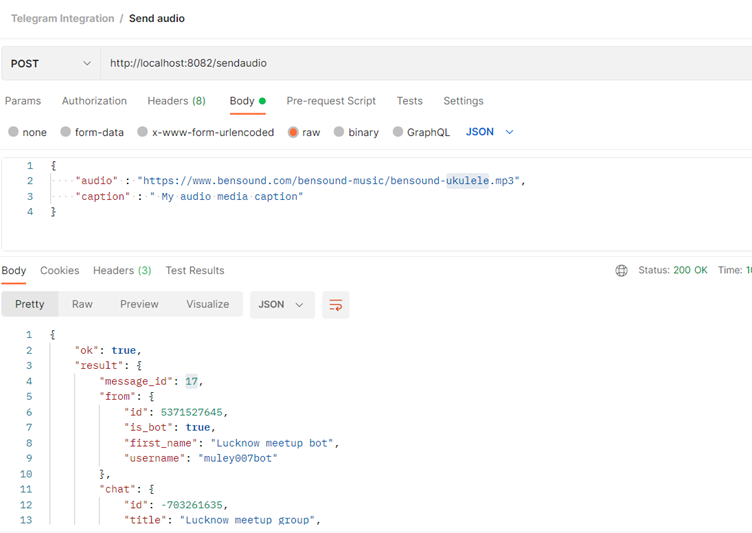
Figure 19: Send audio request and response
To send a media (video) video field is required.
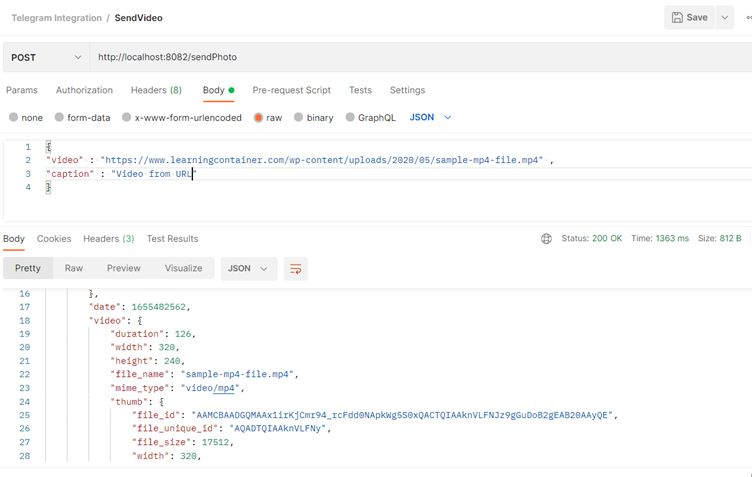
Figure 20 Send video request and response
To send a media(document) document field is required.
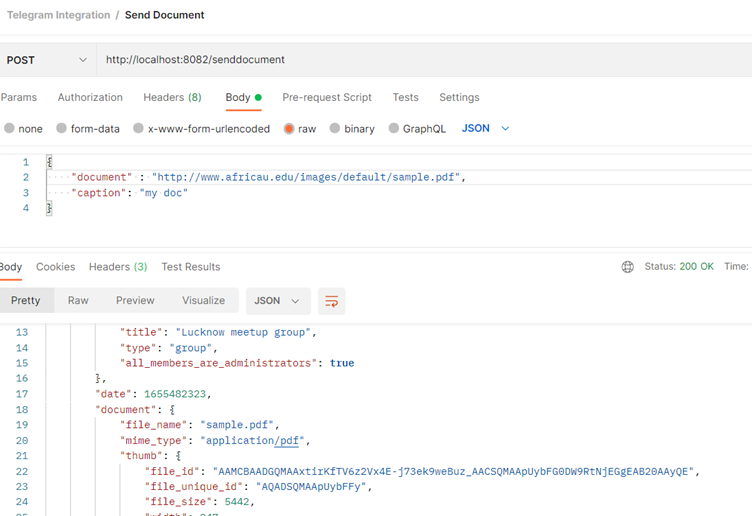
Figure 21 Send document request and response
To send a media (gifs etc) animation field is required.
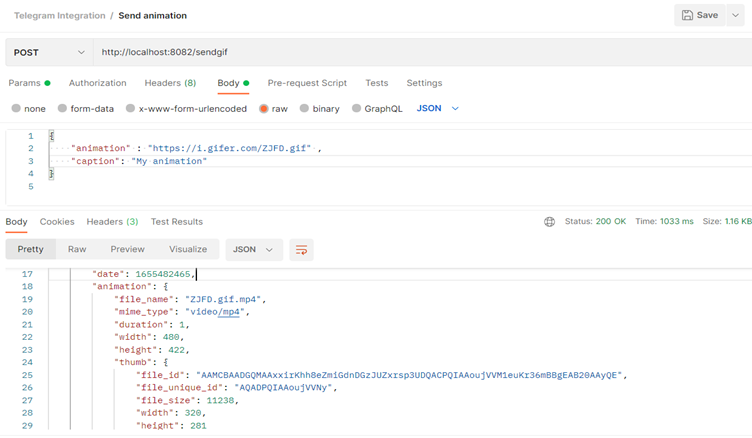
Figure 22 Send animation request and response
Now let’s see how we can set the json body payload for all media type.
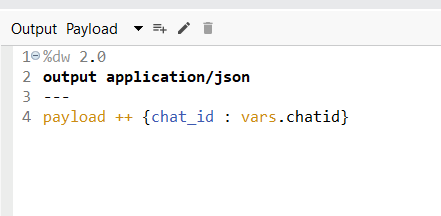
Figure 23: request payload transform
Next, we have to add a respective operation connector from mule palette, like sending an audio message to send an audio file.
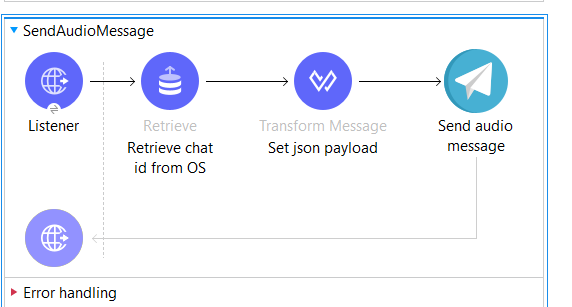
Figure 24: Send audio flow
So that’s how we can perform all the basic operations. Nowlet’s see how we can implement a basic telegram chatbot using mulesoft.
Telegram Chatbot Implementation
Nowlet’s see how we can implement a basic telegram chatbot using mulesoft that will do auto replies to whatever message being sent over the group chat.
GetUpdates Flow
This flow gets triggered every 4 seconds by a scheduler, allowing it to receive all updates from the group chat out of which it will extract the chat id, last message received and the time of receipt.

Figure 25: GetUpdates flow for Telegram chatbot implementation

Figure 26: Store chatid in OS
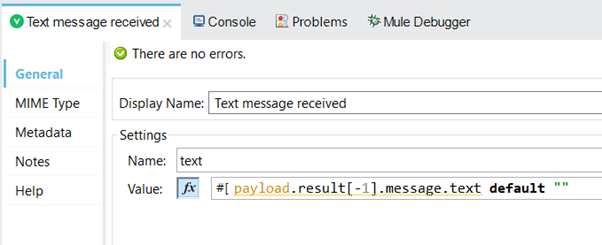
Figure 27: Store last message from the group chat
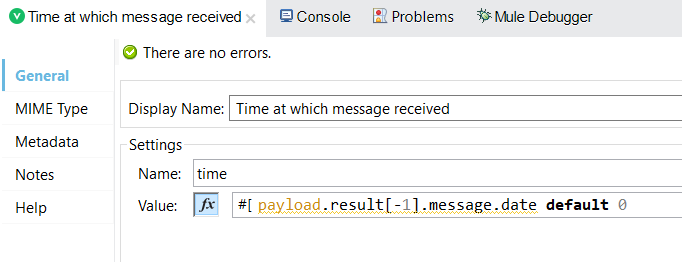
Figure 28: Store the time when last msg was received
It will then verify whether the message is latest or older than 5 seconds.

Figure 29 Verify latest message
If it is latest, will call to the SendMessage flow along with text payload, otherwise it will simply log a message not as a new message.
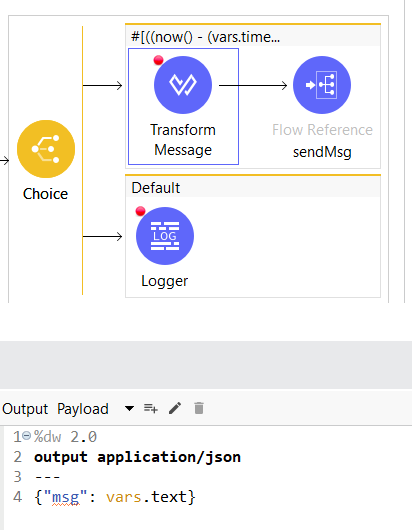
Figure 30: choice condition with transform
SendMessage Flow
This flow first retrieves the chatid from OS.

Figure 31: Send message flow for telegram chatbot implementation
Next, it will read a qna chitchat dataset which will have around 10,000 questions and answers.
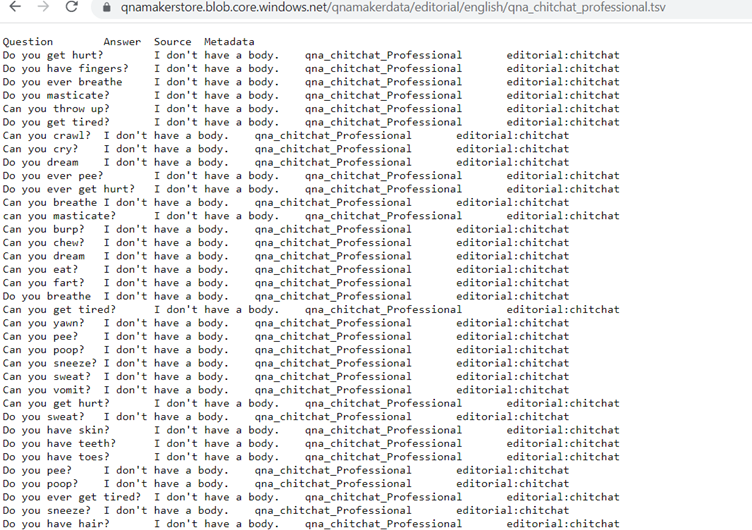
Figure 32: qna dataset
Each message received from the chat group will be matched against this dataset. If we have a match, it will store the index of that question and the same index’s respective answer will be sent as auto reply.
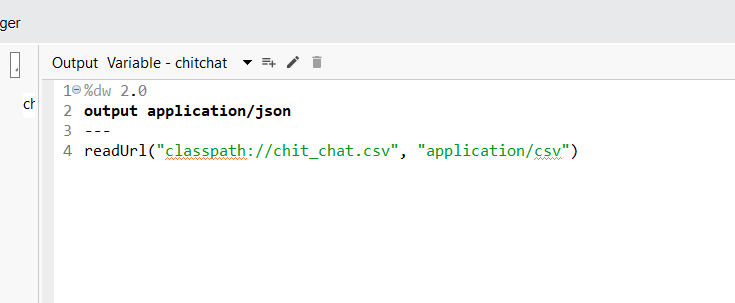
Figure 33: read file as json
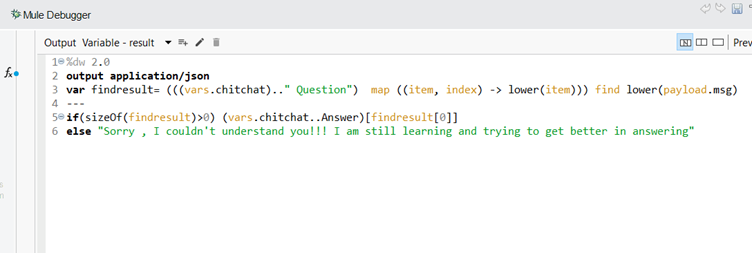
Figure 34: Match msg with dataset
Finally, it will set the json body payload for the send text message operation.
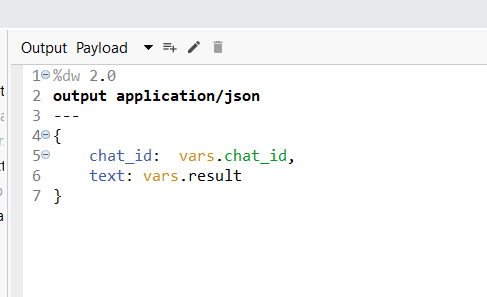
Figure 35: Final request payload
Now let’s see some images of auto replies for a user over the Telegram group chat.
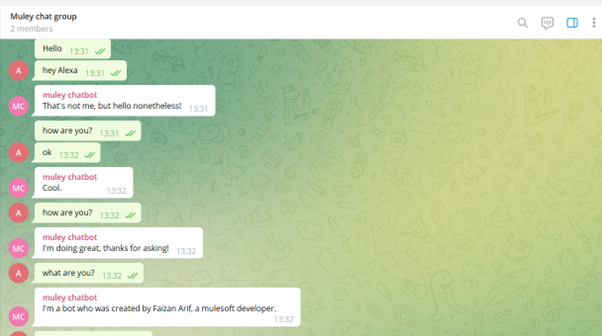
Figure 36: bot auto-replies-1
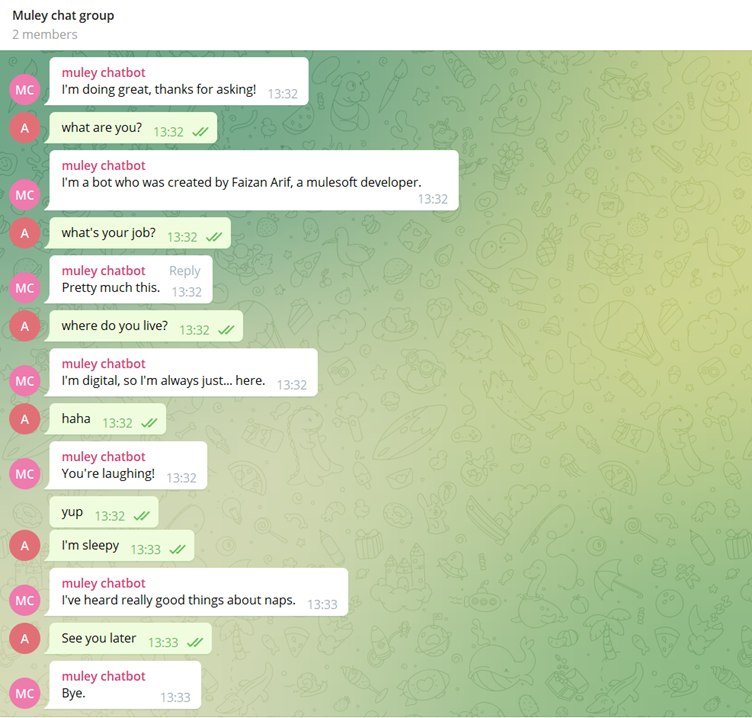
Figure 37: bot auto-replies-2
Conclusion
We covered how to create and manage the bot in Telegram, basic integration and the various operations with the Telegram connector, as well as how to implement a basic Telegram chatbot using mulesoft.
Thanks for reading
References


