

You must have already encountered the term “Aggregation Pipeline” while using MongoDB and may potentially be wondering what it referred to. Well, the aggregation pipeline is a framework for data aggregation modelled based on the concept of data processing pipelines. How does it work? Documents simply enter a multi-stage pipeline that transforms them into aggregated results.
Using the Mule 4 MongoDB Connector-Execute Command Operation
We have seen MongoDB Connector within Mule 4 and there is no specific component for Aggregation. We have the “Execute Command” component under the MongoDB connector. Initially, I found it challenging and went through all the possibilities to see how we would be able to execute the pipeline in Mule. Following extensive research, I eventually found a solution that is quite simple, which I would like to share with you.
Before introducing the method of running the Aggregation Pipeline command in Mule 4 – MongoDB connector – “Execute Command” component, I would like to show you simple steps to firstly set up MongoDB for your POC (Proof of Concept) purpose.
Step 1:
Create an online free cloud-based MongoDB server – Mongo Atlas through the following link: (https://cloud.mongodb.com/).
This is an easier hands-on way of setting up the server. However, you may also choose the on-prem installation.
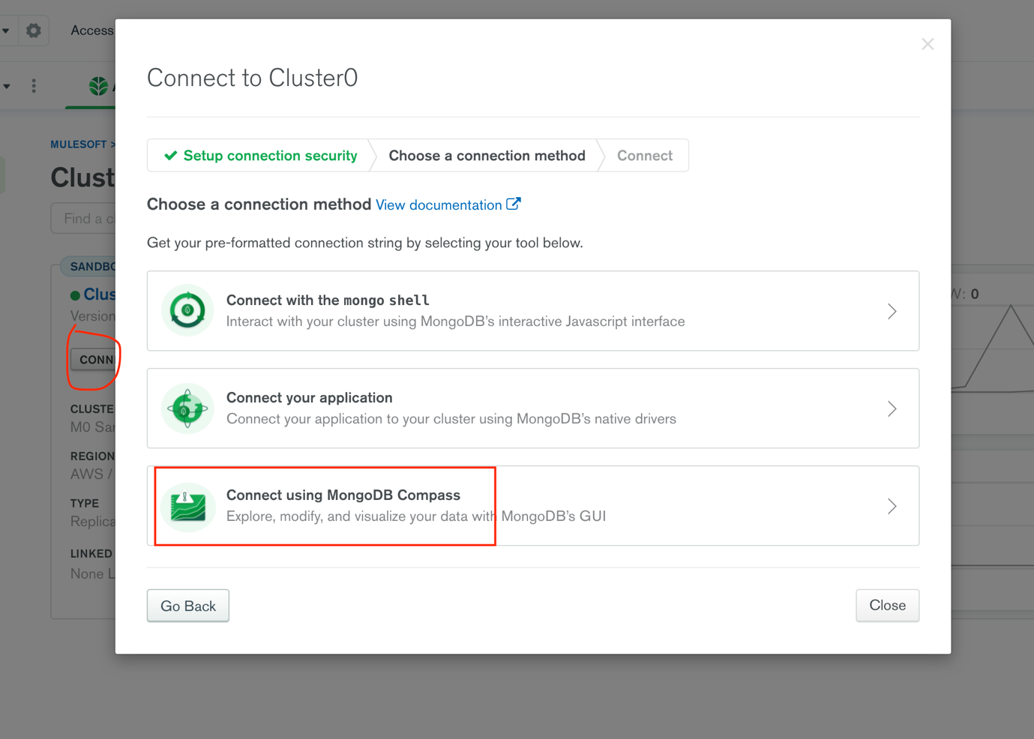
I have used the AWS option for storage. Once the cluster is created, the steps to take are as follows:
- Click on Connect
- Connect Using MongoDB Compass
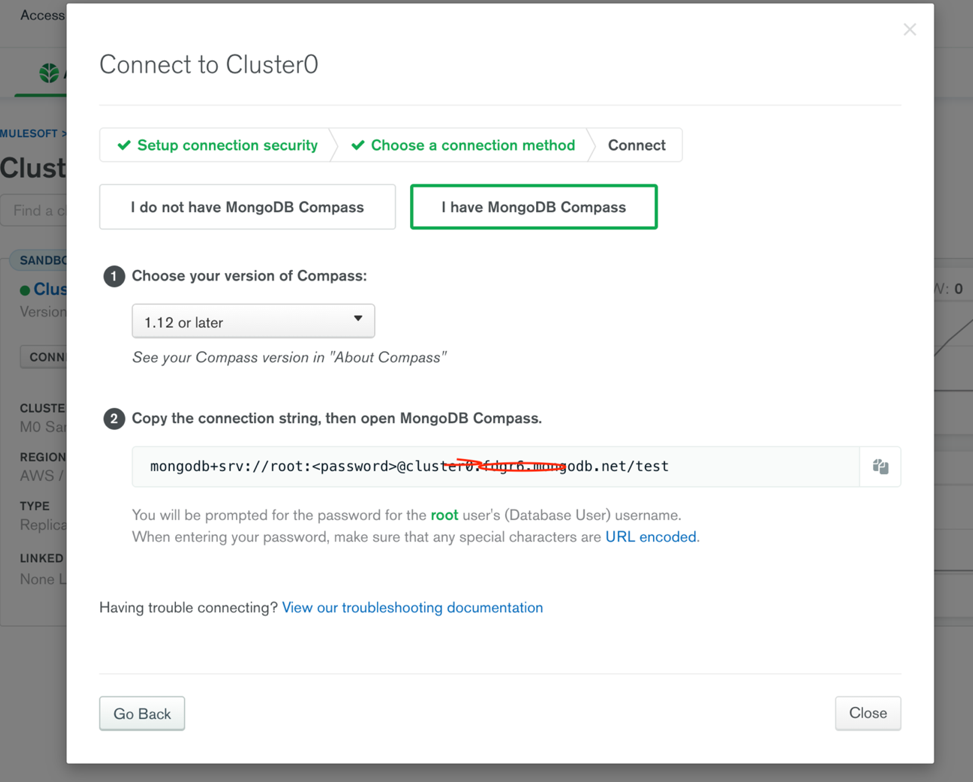
- Tick the “I have MongoDB compass” box and copy the URL right under – It helps connect using MongoDB compass
Connection string:
Example: mongodb+srv://<username>:<password>@clustername.number.mongodb.net>test
Step 2:
Next, download MongoDB compass – Similar to WorkBench, this is just a visual interface where we are able to perform the operations.
Download here: https://www.mongodb.com/try/download/compass
Next:
- Click on connect
- Use the URL that we got from Step 1, which connects you to DB
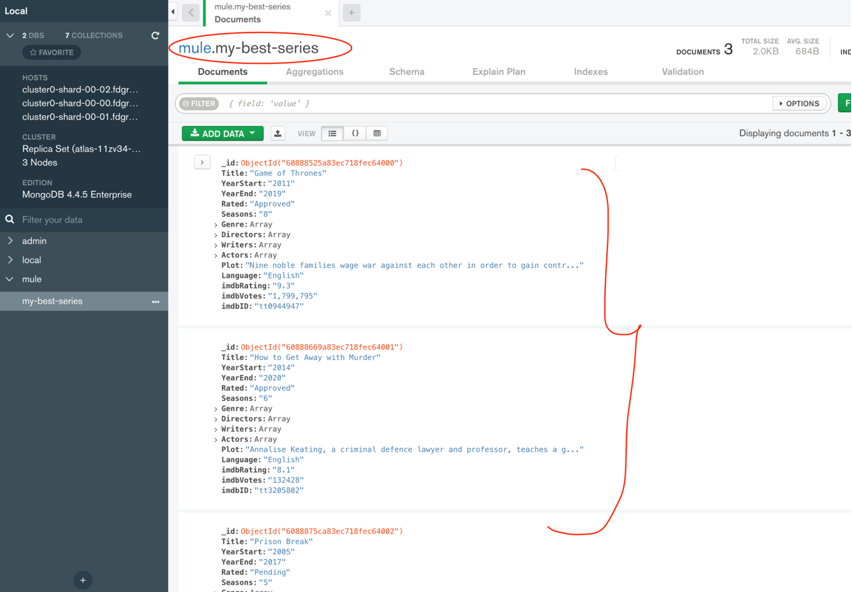
By default, you will now be able to see two Databases: admin and local. For this POC I have created a new database called “mule”
Step 3:
- Create a new Collection (which we call Table in SQL Terms).
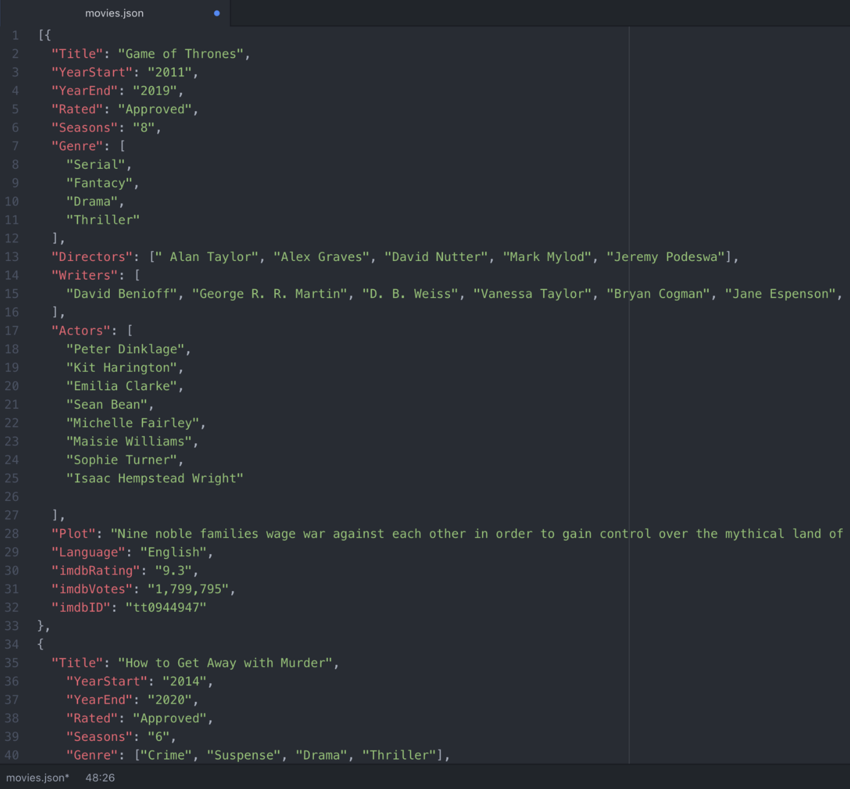
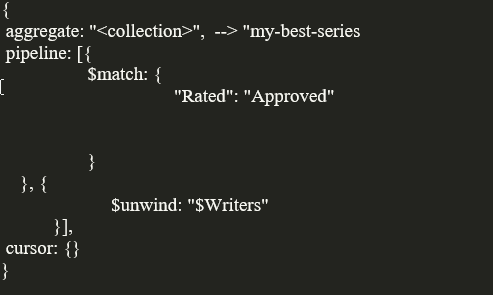
I have used “my-best-series” for this POC. - Next, insert Documents (which we call rows in SQL Terms).
You can import Data in JSON or CSV (NO SQL are all in JSON format). I have created a JSON file with sample data, we can add one or more rows.
Once you have loaded, you’ll see the records are inserted successfully.
Step 4:
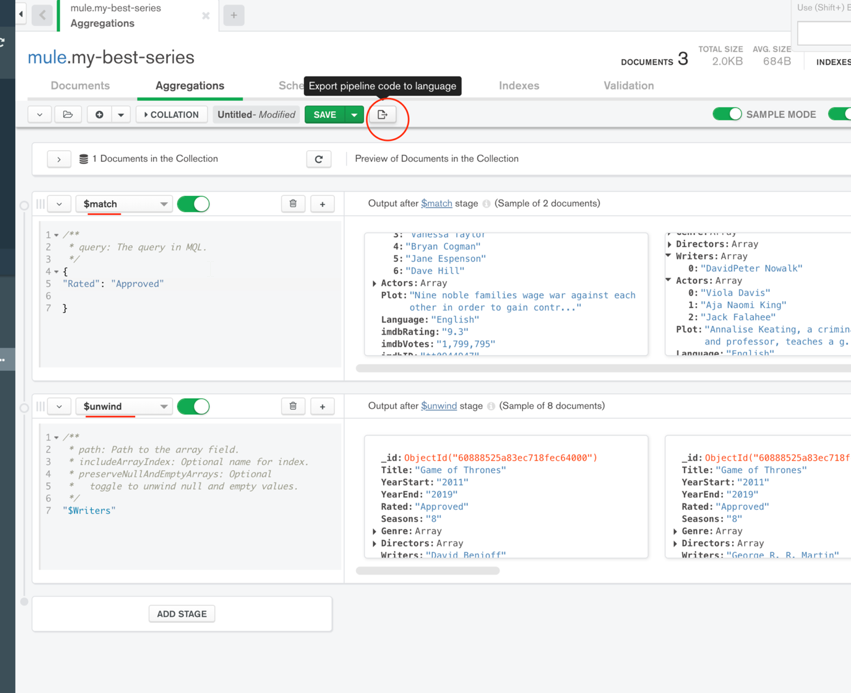
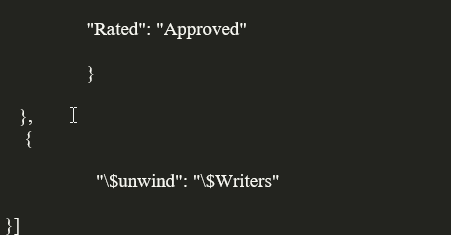
- Go to the Aggregation Tab in MongoDB compass and add the stages with the required transformation you want to perform on the data.
I have used 2 stages.
- $match to filter out series whose rating is “Approved”
- $unwind – to split rows based on writers. (Original Documents has an array of writers which we now split into individual records. You can search more on Aggregation concepts)
2. Next, click on “Export to Pipeline Language”, which is required for us to use in Mule.
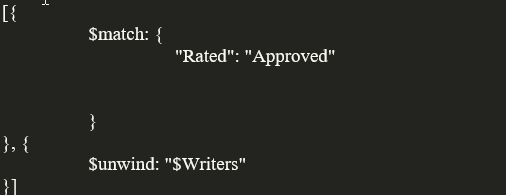
You can see how my Pipeline looks like below:
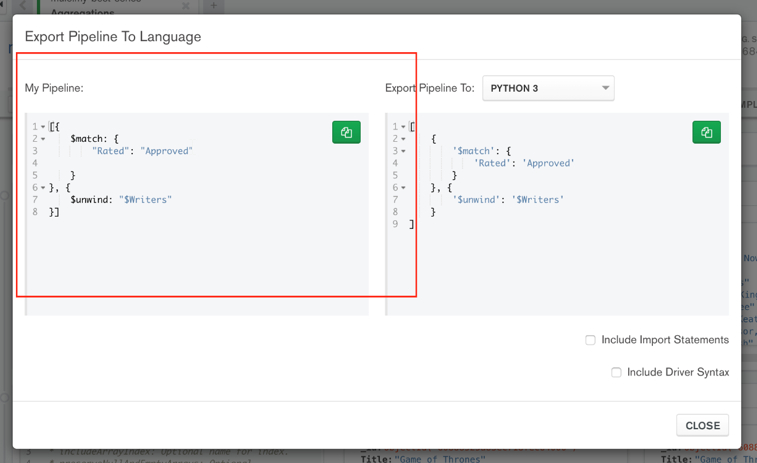
Copy:
Step 5:
- Go to Anypoint Studio
- Download MongoDB connector from Exchange (Version 6.3.2 is used for this demonstration)
- Drag and Drop Execute Command
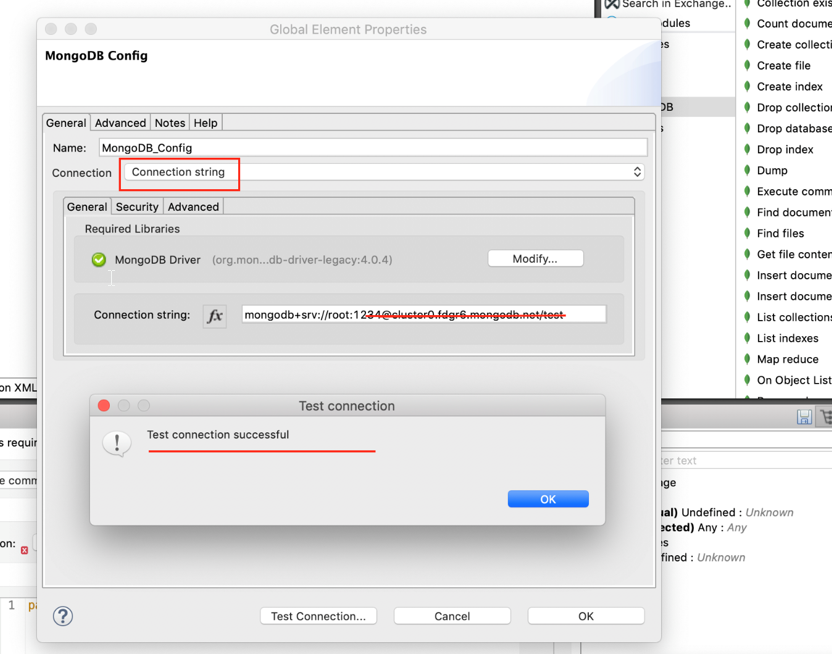
- Click on Add config, and use the recommended library as shown below:
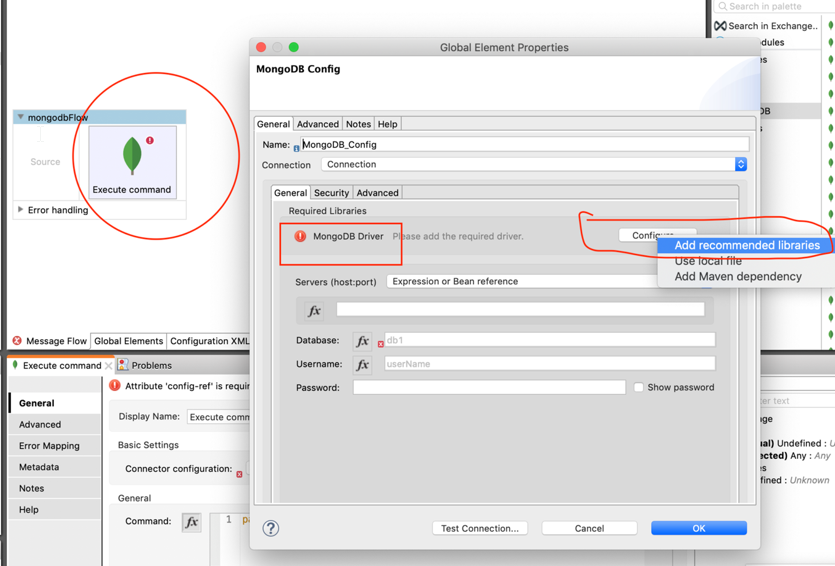
I am using the Connection Type as “Connection string” and used the same string that we used to connect Mongo Compass.
Next, click test connection.
Final Step:
You may use the MongoDB manual as a reference for commands, which you can access through the following link: https://docs.mongodb.com/manual/reference/command/aggregate
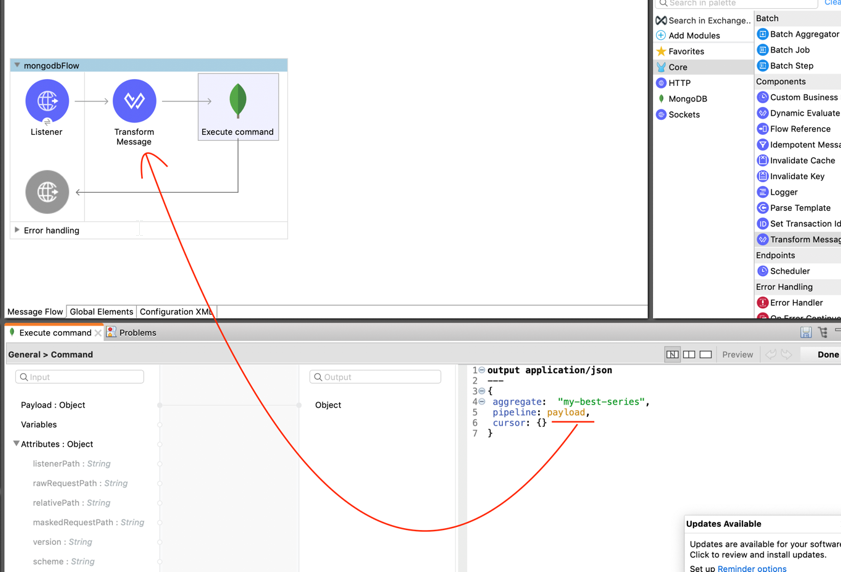
The format we need to use in “Execute Command” is:
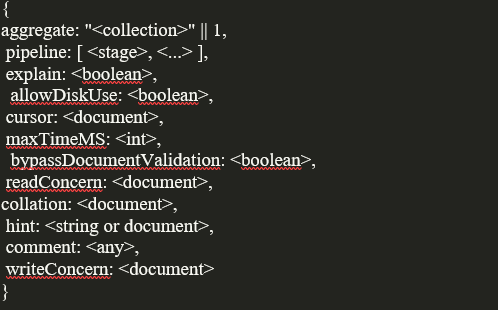
For our specific case, I will be using:
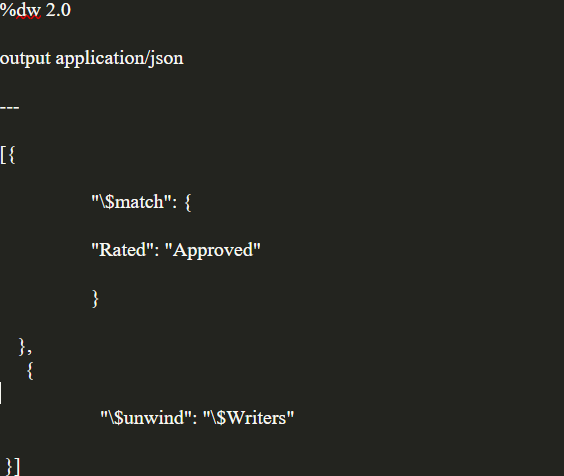
Transform Message :
Execute Command:
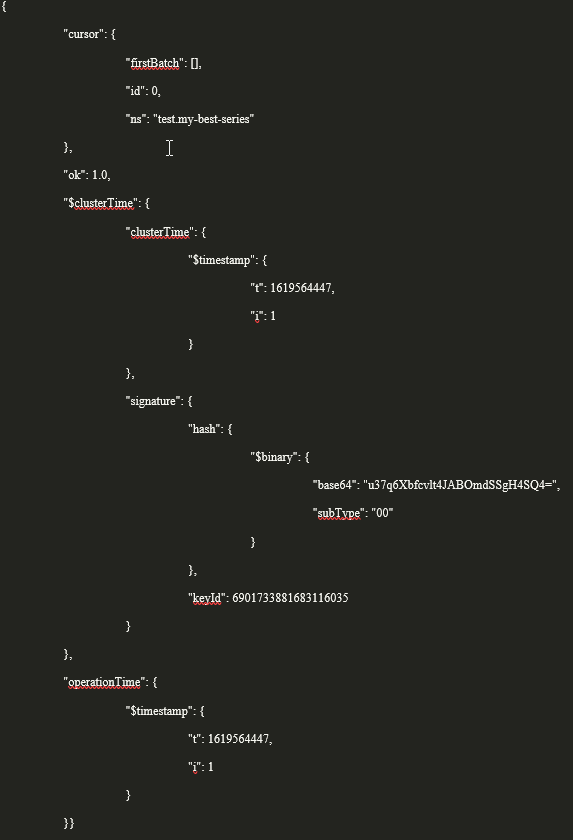
We are all set to run the app!
You can see the desired output. On the other hand, you may find your actual data under firstBatch: (my match case is not found, thus why the system gave empty array)
This concludes how we can run the Aggregation Pipeline command using the “Execute command” connector of MongoDB, in Mule 4.
Don’t forget to use the MongoDB manual as a reference as it is what helped me! https://docs.mongodb.com/manual/reference/command/aggregate/
I hope that I have been clear and concise with this demonstration and that it helped out make the process smoother.