

In this article, I will show you how to connect to various AWS services from the Mule application, how to connect My SQL Server to Amazon RDS and retrieve some data from the database, and then send that information as a file to the Amazon S3 bucket using the Amazon S3 Create Object Connector.
Amazon S3 is a storage service provided by Amazon Web Services. The correct name of Amazon S3 is Amazon Simple Storage Service. It is a high-speed cloud storage that provides online storage and online archiving (S3 Glacier Deep Archive) of applications and data. With AWS Services and S3 Buckets, data storage via AWS is also attractive to Big Data companies. In addition, as part of Amazon Web Services (AWS), S3 provides infrastructure retrieval (cloud computing).
In the following article, I will show you step by step how to use Amazon RDS and Amazon S3 connectors in our Mule application. With our solutions, you even have the ability to connect cloud provider applications with AI capabilities.
Step – 1
Before Starting you should have an Amazon Web Services account. (You can create a free trial account here: Portal AWS ).
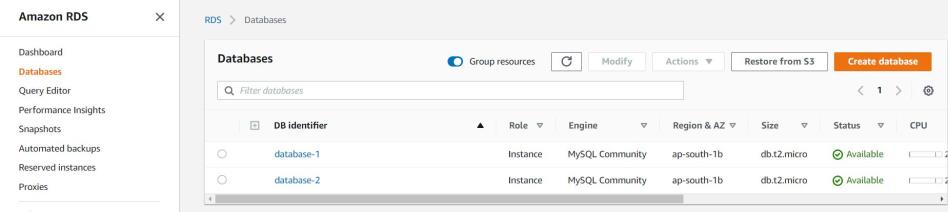
Firstly, we must create a database in the Amazon RDS under the Services tab in which we must enter specific details like Engine type, database name, password, public accessibility.
Step – 2
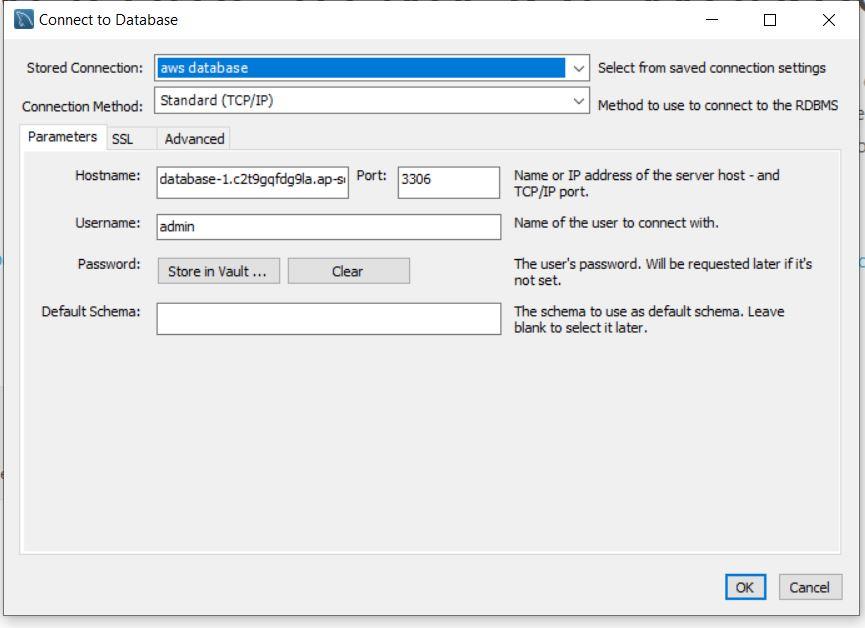
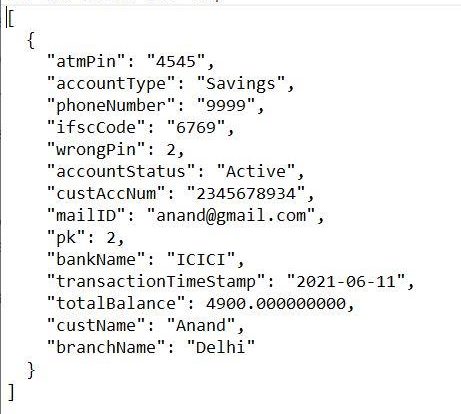
After creating the Database, the next step is to connect My SQL. To test the connection to MySQL, before configuring in Mule App. Try to check if you can make a successful connection in MySQL Workbench. Just add a configuration like Connection name, hostname, port, username, and password. All this information we can find in the database that we have created.
After a successful test connection, we can create a table as per our requirements in MySQL Workbench.
Database Sample Table

Step – 3
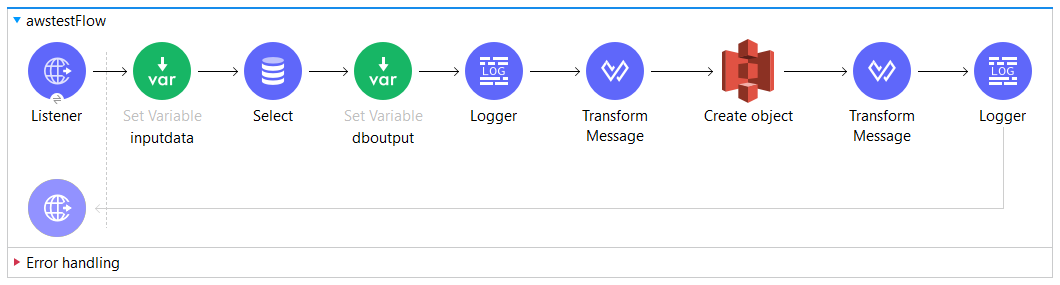
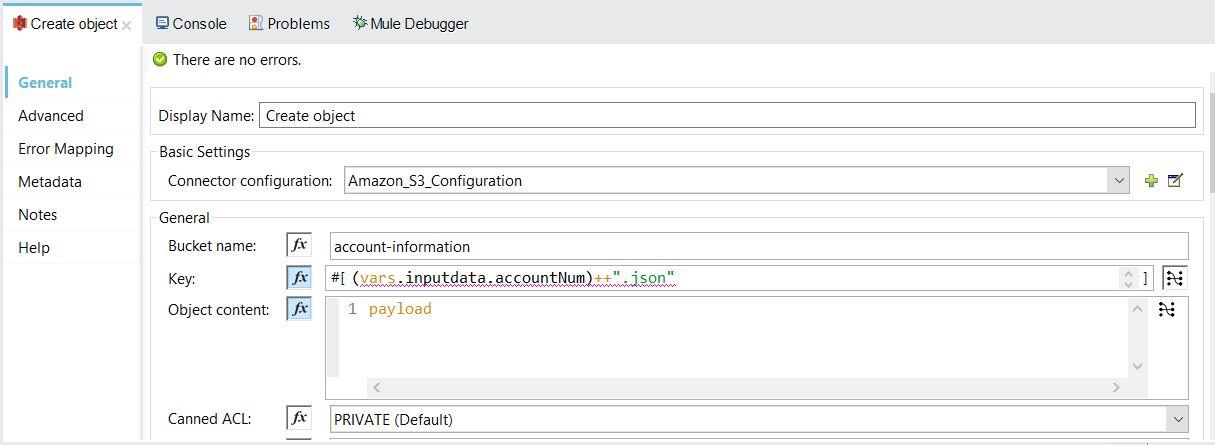
I have created a sample flow in which I have used the SELECT operation to fetch some data from the database, as I have created a database table in My SQL Workbench and then sent the data as a file to Amazon S3 with the help of “Create object” Connector in the Amazon S3 Module, which you can add through add modules.
Step – 4
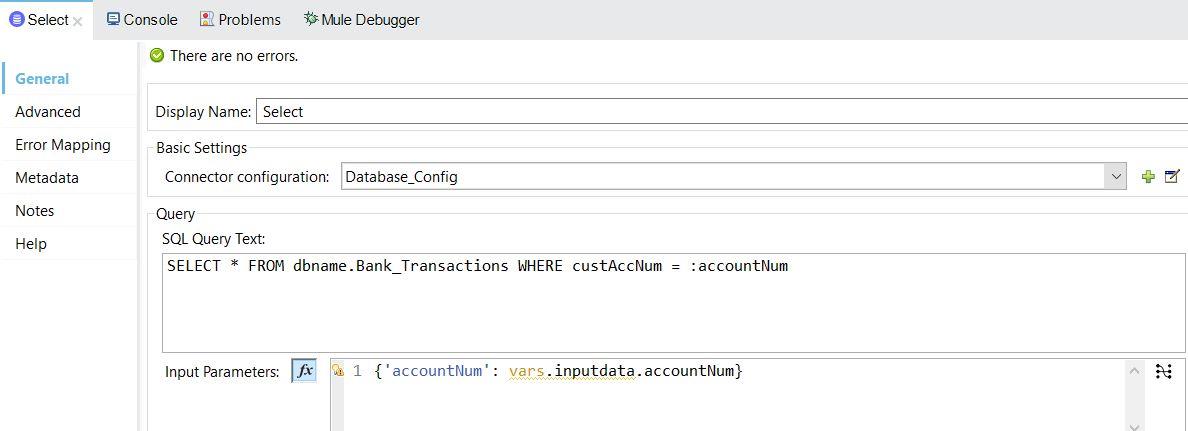
Configuring the SELECT operation by adding the required query.
Step – 5
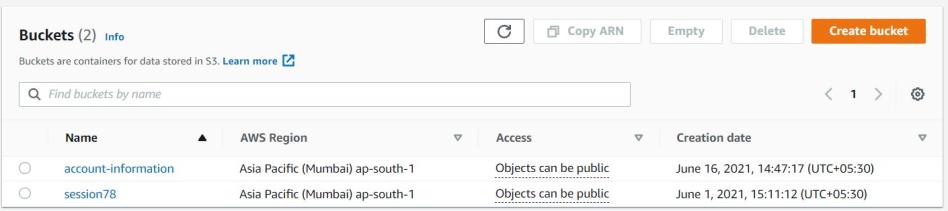
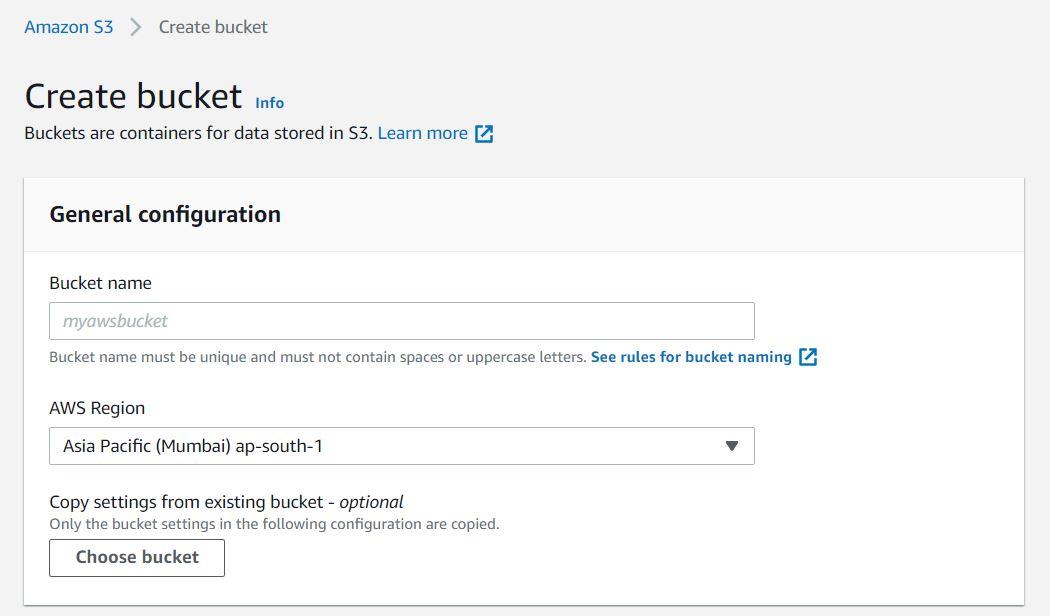
To send data to Amazon S3 firstly we must create a bucket in AWS, which is a cloud storage resource, then you can create an object (can be any file) via Mule App. For creating a bucket add the required details. Please note that you need to edit the Inbound rules of Security groups to allow Mule App to create an object.
Step – 6
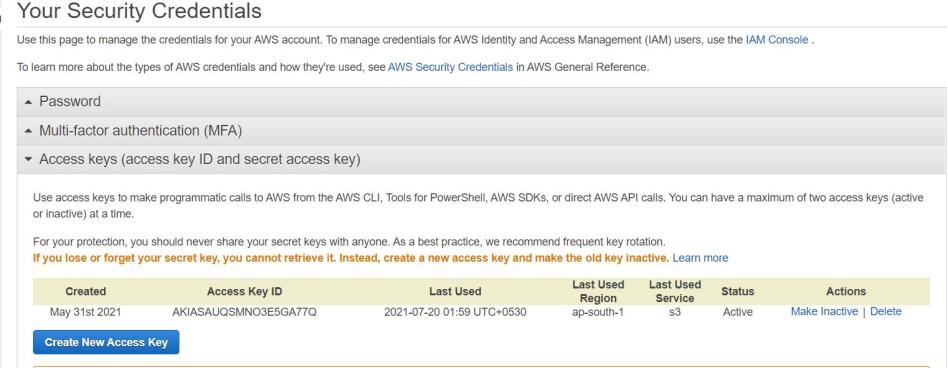
To Configure the Create object connector we require a Secret Key and Access key, which we can find in.
My Security Credentials–> Access Keys
After adding the connector configurations, we need to specify a bucket name and Key (name of the file to store in the bucket).
Step – 7
After configuring all the connectors and executing the flow we will see the file in the bucket.

To verify the data, we can download the file and check.
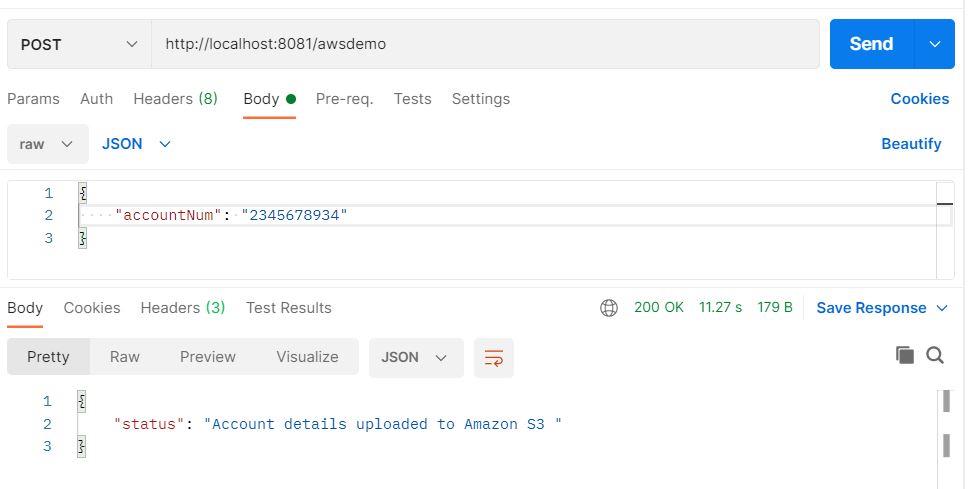
Postman Request and Response
Conclusion
To summarize, the Amazon Relational Database Service (Amazon RDS) makes it easy to set up, operate, and scale a relational database in the cloud. It has several database engines like MySQL which we used in our demo. One of the services of AWS is S3, which is a cloud storage. This article was written to show you how easy it is to connect to various systems using MuleSoft as an Integration platform.